Steps to set up:
- Click on Campaigns
- Click on Add new campaign
- Fill in a Campaign name
- Choose type of campaign
- Choose the type of template you want
- Add people
- Go to Steps
- Write a body message for the first message (which will be sent with your connection request)
- (optional) Write an alternative body
- (optional) Add follow-up messages
- Click Apply
- Go to Settings
- Click on Start immediately (it becomes blue) or turn it off (you can choose the date and time you want your campaign to start)
- Click on Status to activate your campaign (when it’s activated, it is blue)
- Set campaign limits (how many requests it sends per day) – the maximum is 100
- Click Apply
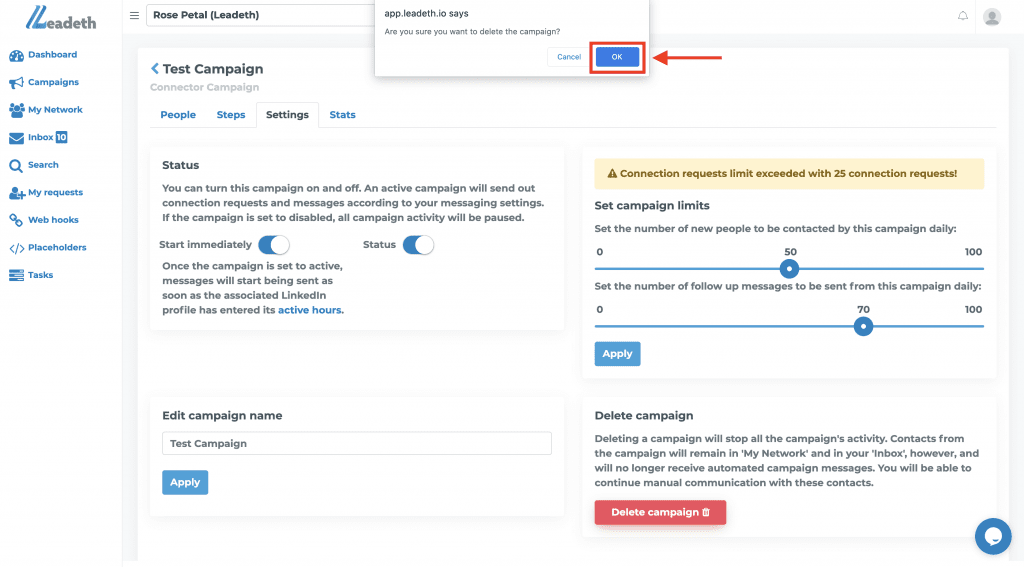
You can also edit the name of the campaign in this menu or delete a campaign.
If one person is a part of two campaigns, the messages from only one of the campaigns will be sent to that person, the other campaign will be paused.
Don’t forget to give the software ~45 min until your campaigns start sending requests and messages.
You can create as many campaigns as you want, just remember that Leadeth won’t send more connections/messages than your daily limit (maximum 100).
Details explanation:
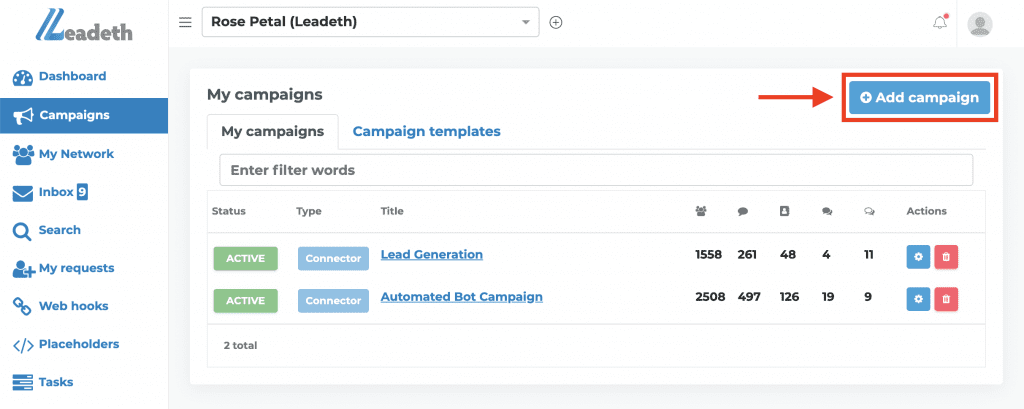
In order to create a campaign, go to the menu on the left and click on Campaigns. This will lead you to a page with all your current campaigns (if you have any) and there you can create a New Campaign by clicking on Add campaign.
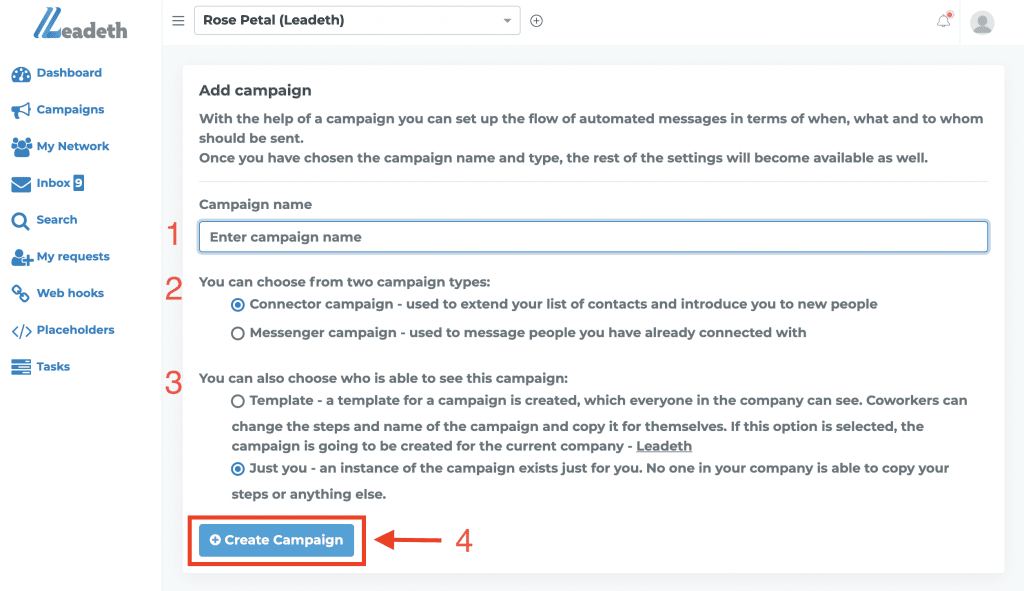
After you click on Add campaign, you will be sent to another page. There you should first name your campaign (e.g. ‘My First Campaign’ or something more specific like ‘UK Engineering MDs’).
Then you should choose whether to create a Messenger campaign or a Connector campaign. The difference between the two campaigns is that the Connector campaign is used to make new connections (send connection requests + messages) while the Messenger campaign is used to send messages to already established 1st-degree connections in LinkedIn.
After you decide which type of campaign to use, you should choose whether to create this campaign as a template for all of your colleagues or customers to use (all the profiles which are managed by one Admin account can see these templates), or you want to keep it for yourself only.
Once you’ve decided on all of the previous steps, you should click on Create campaign.
Once you’ve created the campaign you’re sent to a new page where you should fill in the details about the campaign you just created.
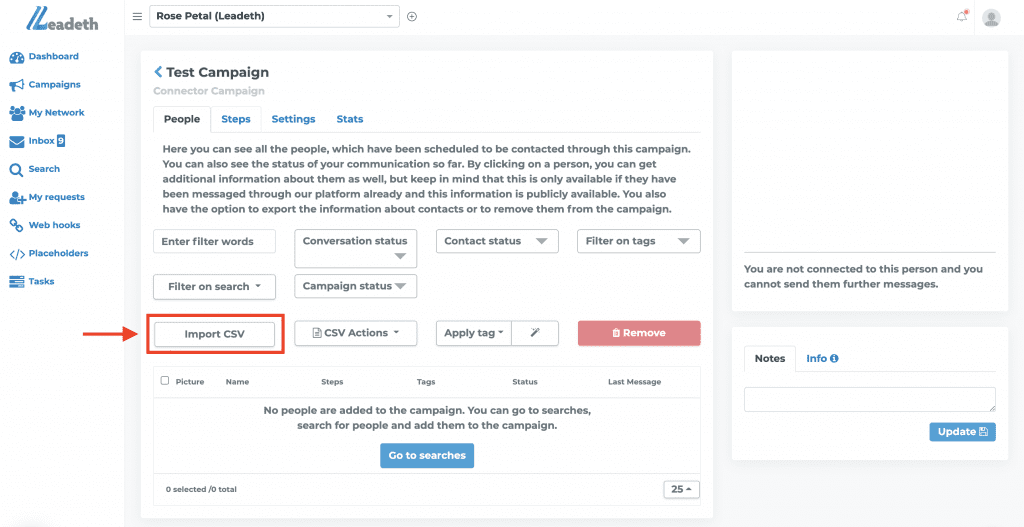
The first step is to import the people you want to connect with. This can be done directly when creating a campaign by importing a CSV file. Please refer to the section “How to Import a CSV file” in the Help Center which explains how exactly to do that.
If you want to import people in any other way, it should be done outside of the campaign settings, in the Search menu.
If one person is a part of two campaigns, the messages from only one of the campaigns will be sent to that person, the other campaign will be paused.
Refer to the article Upload a CSV in Help Center.
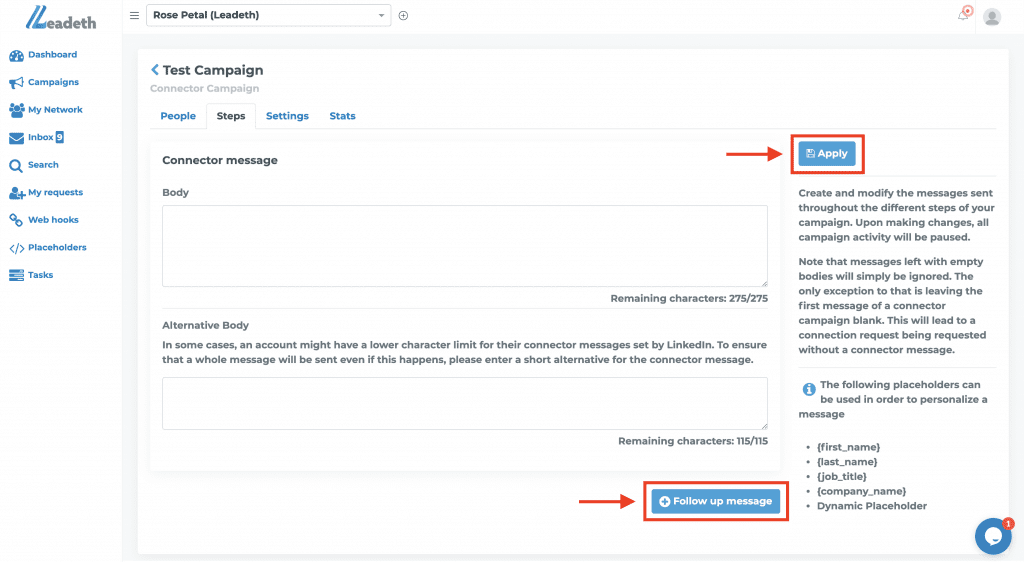
Once you’re done with importing people into your campaign, you can go to the next step in the menu Steps to create the messages you want to send with your connection requests.
You should type in the section Body to create a message to accompany your connection request. Eventually, an alternative body can be created in case there is character limitations set by LinkedIn.
In this section, you can also create follow up messages to send. The follow-up messages are messages which are sent after there is an established connection but still no response to the first message you sent.
You can also add follow up messages later.
After you’ve written your messages and follow up messages, you should go to the tap Settings.
- In this page you can check if your campaign is going to start immediately (in approximately 45 minutes) or you can schedule it to start on a desired date and time.
- In this menu, you should also make sure that the button Status is BLUE which means that your campaign is active.
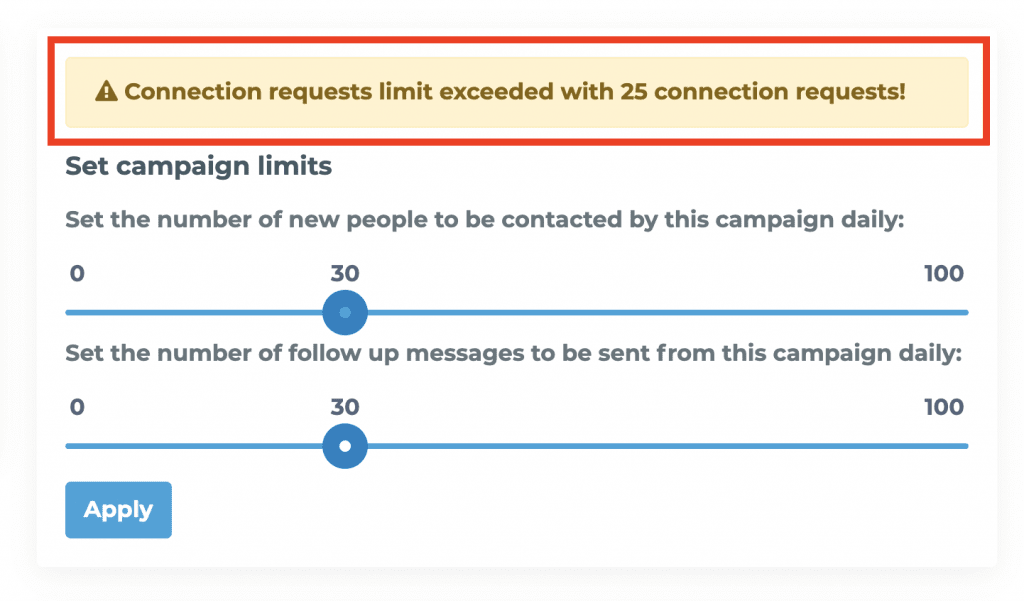
- Additionally, here you can set campaign limits, by choosing how many messages and connection request to send out per day. This is available for every campaign which is active and will contribute to the total. Keep in mind that from your account, a maximum of 100 connections can be sent per day. Even if you have 4 campaigns set at 100 people per day, Leadeth is going to send connections to 100 people in total from your account per day, so please divide the total accordingly.
If you get a warning message about exceeding your daily limits please look at all active campaigns and adjust the numbers accordingly. When sending a connection request with a message, the connection request message is counted towards the daily messages sent from Leadeth.
Don’t forget to click on Apply once you’re done with the changes.
Congratulations, you just created your campaign!

You can also delete your campaign in this menu by clicking on Delete campaign in the right bottom corner. If you’re sure you want to delete the campaign, click on OK when this window pops up.